25 July 2014

Post Miniature Painting Class -Elephant

I spent two additional evenings at home after work to complete the shading to the elephant, and add a bit more colours to the flowers to give them more depth. I used the paint that I got from the class a month ago. The pigments are amazing and they instantly work beautifully again on the painting,


Indian Miniature painting revisited Class 8 ( no 7) - last class

This is the last class, where we add more to the elephant's face, a few gold elements and the man on top of the elephant as well as the border in gold.

The trick with gold paint is to brush it in one go rather re brushing the same area. Once it is painted and dry , use a smooth stone to burnish it so the gold is more reflective.


In this class we also worked more on the face of the elephant , colouring the eye was the key to make the elephant come alive.


This is the painting I had at the end of the class. There are still quite a few shading to do that I intended to continue. Overall I enjoyed the class a lot, it is a very mediative experience.  I did the same course with the same teacher 4 years ago and I have learnt something new. I think my skill has definitely improved from the last time also. ( the last blog was in February 2010)


Indian Miniature painting revisited Class 6


Today 's class is about adding all the finer details on the elephant. So we did the tracing of the finer details on another tracing paper and retrace the details on the cloth on top of the elephant, which has been painted in yellow.


The steps are like the first time when tracing the outline of the elephant.


We then start painting the flowers in more details.  One technique to use is to give everything a slight shading so the details don't appear too flat.


This is where I got to at the end of the class. As I have to skip the next class I finish off the details in my own time.

This is the brand of gouache our teacher recommends if we don't have the means to obtain the powder and do the grinding and creating the paint.
However, having try this method I would recommend making your own paint if you could, because the colour are definitely more opaque and vibrant.


24 July 2014

Indian Miniature painting revisited Class 5


We started off the class with the shading of the elephant. This week is about getting used to shade in the invisble and subtle way. I call it the ''stroking'' of the elephant.


My teacher sam helped me with some of the strokes on the chin and near the tusk, watching her in action closely helped me understand the shading process.


Here are some of the progress that I have made.
The hind legs are from the week before, the shading is not so subtle


The front legs from this week are more subtle, I think I am starting to grasp a bit more about the colours and the brush strokes needed to achieve the invisible shading.


At the end of the class  I have attempted to shade the whole of elephant, at least at the first stage.


28 May 2014

Indian Miniature painting revisited Class 4

Today we are starting the finer painting of the elephant, in the way that my teacher Sam called ''invisible shading'' she would use walnut ink and dilute it out with water to get a very pale brown colour and start layering an area. In the beginning you can hardly see any colours but after she works in an area for a while the shading would become very noticeable. She recommends that we use a clean paper to cover the parts that we are not shading to keep it clean.


This i smy first attempt, unfortunately it looks more like pencil shading, and it is less subtle than Sam's. And another frustrating thing about this is it is quite hard to gauge how to get the pale brown colour so it is neither too dark nor pale, and that the brush is neither too wet or dry. Sam reassures me that it is a learning process and it will take sometime to gauge it. She also suggests that we always test it on the paper before applying it directly to the drawing. So for the rest of the class we all try to learn to shade properly.


22 May 2014

Indian Miniature painting revisited Class 3

Today we started using colours. Our teacher Sam has brought in a number of colour bowls with pigments in them, and also a few jars of pigments.

These pigments can be brought from shops and they all have slightly different characteristics - some dry faster than others, or need more water/gum Arabic. They typically last for a long time and will go a long way for very small amount.

Even if they have dried up, you could revive the colours by adding water and gum Arabic to it again, preferably with your finger to grind down the little lumps. Make sure you let them dry naturally and not let them go mouldy ( e.g. indigo as it is an organic plant)


Step 1 - Add the pigments in the centre of a glass sheet ( can get it cheaper as a piece of sand blasted glass, use the grainy side)


Step 2  - Make it a paste ( we are using zinc white) add water, and gum Arabic 10 to 11 drops for the pile as shown. better to add more later so don't add too many drops. (Not enough gum Arabic the paint could be rubbed off easily, too much and the paint will crack.) Mix all well into a paste. 


Step 3  - Use a glass muller to grind the paste to get rid of the lumps until the paint is even and smooth. Bring the paint back to the centre and scrap into a bowl when this is done.


Step 5 - this is a must, after mixing the paint it is a good idea to paint it on a paper strip, let it dry and then rub fingers against the paint. If it rubs off the paint will need a bit more gum Arabic - at this point just add a few drops in the bowl and mix with the brush and retry - only a few drops at the time and don't overdo it.


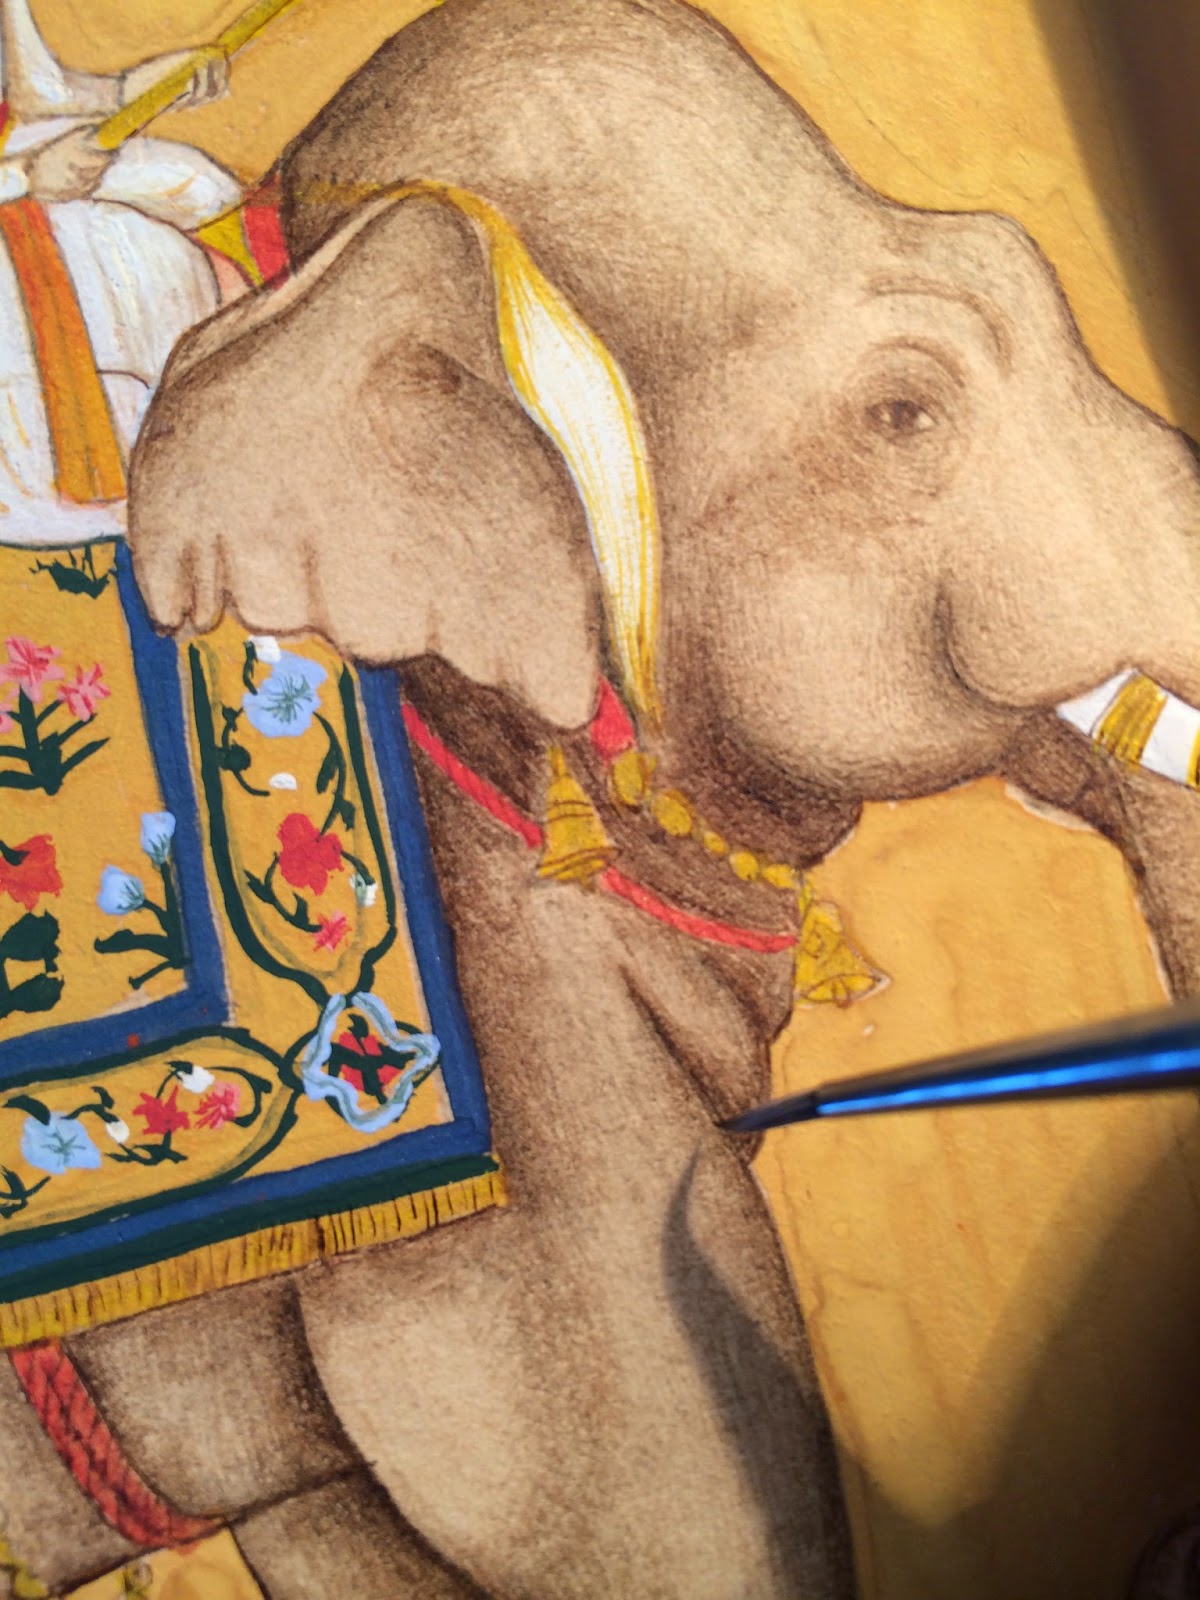
Step 6 - We have mixed a yellow that everyone is happy with and we trace the outline of the image first and fill in the paint, trying to paint once and not retracing the paint area too much.
 

Step 7 - To make it more interesting our teacher suggested that we add a line of green paint at the top and then wash it with water for variation. We have done quite a lot in the class this time!


TIP - home made Gum Arabic - add cold water for one hour and strain with Muslim cloth

Indian Miniature painting revisited Class 2

In this class we transfer images onto our wasli paper. the class was a bit shorter this time, with our teacher explaining there are two ways to approach the drawing. we could either add the opaque colours on the main elements and then add fine brush strokes, or we could use ink wash as the basis for adding the fine brush strokes.


Step 1 - We rubbed red orche onto the back on the tracing paper.


Step 2 - we positioned and tapped down the tracing paper onto the wasli paper, and once again trace the key outlines onto the wasli page.


 step 3 - We are now ready to start the next step of colouring in. Our teacher explained to us that we could use an ink wash as the background or opaque colours.


8 May 2014

Indian Miniature Painting revisited - Class 1


I started another one of the Indian miniature class that I did at Princes School of Traditional Arts a few years ago as I really enjoyed it, and thought i

I have the same teacher Samantha Buckley, who I had 4 years ago. She is a very good teacher and very patient with the students so I am glad that I have her again. This time the class is held at the Art Workers Guild, a beautiful old building located near Russell Square, it is a lovely place to spend time drawing away.


Step 1
Sam gave us each a 'Wasali' paper that is especially made for the purpose of Indian miniature painting. It is made of 3 to 4 layers of a 300gsm thick paper glue together by flour and water. Our first task was to tape it down with gum tape( with water on the shiny side) and glue the paper onto a hard board.


Step 2
We used a broad brush and dip it in tea stain and brush over the surface of the board and let it dry.( tea stain - 3 tea bags and half cup of water - depending the effect you are after) brush it in one direction a few times)


Step 3
We selected the picture we want, and now use a sharp pencil to trace out the main outlines of what we would like to draw. I have chosen an elephant as i like the composition of the painting.


Step 4
We learn to use the squirrel hair brush. They are generally not available to buy in the UK and our teacher brought hers from India. These brushes are very fine and can only last up to 2 or 3 miniature paintings. They have to be taken care as they are very delicate. Sam prepared some Chinese ink in the mussel shells ( where paints are traditionally stored) and gave each us some ink and some water. She then showed us how to 'warm up' with these brushes, by drawing delicate spirals for us to get used to the feel of the brush. I have taken picture of my attempts.
Usually it is recommended that one does this for up to 30mins before a miniature painting not only to warm up, but to prepare one for the meditative task ahead.


Step 5
By now the tea stain paper should be dry up, so now is the opportunity to burnish the paper with a very smooth stone you can get from the natural history museum( or shell as it is traditionally done). One is to burnish the paper both horizontally and vertically for equal length of time. This exercise should take up to 15 mins until the paper surface is smooth with a slight sheen. So now the paper is ready for the next class!