Showing posts with label PSTA. Show all posts

22 January 2016

Indian Miniature Painting 6 - 8 - Landscape

These last few classes are about the details - in my case there are plenty of tree leaves to add. As mentioned before there are more details to add and less standing to do for this painting. The small amount of shading are done on the cow and the person on the tree's clothes and also the tree trunks. These are subtle way of brushing very light colour again and again in the same area to create a subtle shade or line and it is extremely delicate and beautiful when done right, a skill I am yet to master still.

On the other hand there are many details to add and I decided to take liberty with my interpretations of how to create these leaves. In the beginning I created a number of different leaves and colours. However, I decided to revisit some of the details to make it look more cohesive and harmonious.

I also started using the miniature brush to add some delicate subtle shading and marks around the leaves to make them stand out.


1. Starting to add leaves to the trees


2. Initial end result - somehow it didn't feel quite right


3. I started to repaint the leaves again in the same shapes but make the variation in colours. One lovely thing about painting these leaves is that I could easily match the colours or vary the shades with the amount of water I mixed the paint in. Therefore I was able to create a variety of subtly changing shades and variety to the painting with just one type of leaf and one colour.


4. Our teacher Sam also asked us to add a gold border around the painting to frame it up properly. We did have to brush up a light yellow line first as the base colour, then it was water and gold paint brushed directly onto the line to create a beautiful (and not so straight) border. After we did it we used a smooth stone to rub the gold gently to make sure it is firmly ingrained onto the paper.


5. I also made a start on painting the person ( or is this a god?) and the cow ( holy?) on the painting under Sam's supervision, to ensure I get the right colour match and painting them in a delicate manner.


6. This is where I got to towards the end of the class. I shaded the branches with my Indian miniature painting brush ( the one tree trunk on the right only) and I still have plenty of blossoms to add. I plan to finish in my own time and share the final artwork here once completed.


Indian Miniature Painting 4 to 5 - Landscape


These classes are about mixing the right colours to get what I want for the painting as the base. It is a solid paint for the sky, trees and the tree barks. Just a note at this stage it is advisable to use a larger sable brush rather than the delicate squirrel miniature brush to fill in the colours.

Here are the steps;

1. starting with the sky I had to mix an unusual blue, which was different to the one on the painting, but i quite like it at the end. I also used indigo with a dry brushed method to create the breezy look of the sky.


2. The next thing to do are the trees, and my teacher suggested that I do a range of greens to add the variations, quite amazing how a couple of yellow and blues and greens can come up with such a variety of greens.


3. The next step was to attempt the tree bark that was filled with a variation of browns, using the based colours.


4. Here is the rough basis for the painting done.


Indian Miniature Painting 3 - Landscape


In this class we are introduced to the making of the watercolours we used in Miniature painting. they are primarily pigments that are grind down and mixed with water and liquid gum Arabic. They are vivid and vibrant colours and a wonderful sight to behold. I have discussed these in the past but they never cease to amaze me.


Briefly the steps;
1. Have a slab of glass ( with a sand blasted texture - you can get this in an art shop), glass muller , palette knife read, together with your chosen pigment, water and gum Arabic.( to bind the pigment so it stays on the paper when it dries)


2 . Put about 4-5 tablespoon of the pigments in the centre of the slab and add 1/2 tablespoon of water and about the same but less amount of gum Arabic to the centre and start grinding, add a bit of water to it at a time until it feels smooth, and has a slightly thick consistence so it is not too thin. Use the palette knife to scrap the paint back to the centre of the slab so it is not running everywhere.


3. Once the paint is ready, we have to test it on a piece of paper, wait for it to dry and try to rub it off. If it gets rubbed off it means the paint needs more gum Arabic to bind it together. So you will need to add a few drop of gum Arabic and grind it and then test it again. When the paint is finally ready you can pour it in a container and it is ready to be used.


Indian Miniature Painting 2 - Landscape

We start learning the usage of the squirrel brush again, it is a hard thing to master but once remembered it feels like the most natural thing to use.

The Indian Miniature brush is made of squirrel hair and could only be bought in India. The supply is limited and I managed to get 4 from previous classes. 


Do note that the qualities do vary and it is also down to how the individual feels and uses his /her brush.  The one on the left with more of a curve was much better and easier to do. One good test to draw circles, the one with more cuve is much easier  to use.  Here is a sequence of pictures in which I tried to captured how the brush works when I attepmt to draw a circle clockwise.


Apparently it is a normal practice to draw circles with the brush prior to any drawing session for up to 30mins, to familiarise with the use of the brush again. It is largely believed that it calms and clears the mind, and prepares one into the meditative act of painting. It is also the same movement one uses to shade the details. For this particular class though I have a bit more limited use of the shading techniques but more of using the tip to draw very fine, tiny leaves.

20 November 2015

Indian Miniature Painting 1- Landscape

I have enrolled yet in another Indian miniature class this year, this time I am working on a piece that is mostly landscape and I look forward to the challenge. Although it is the same teacher and same  class, I believe you can always learn something new. This is especially true for a technique as old , complex and refined as that of miniature painting which has a long history of traditions and applications.


I have chosen a portion a picture that is rather complex and different to what I have done before. My teacher Samantha Buckley told me it is probably done by a master with a few helpers for a few months at least. A lot of initial ground work have been outlined previously in my two other classes from 2010 and 2014, but here they are again.

Class 1
1. Tea stain brush over the Wasli paper  to give the background a warmer and rich backing colours
2. use gum tape to tape down the wasli paper on a board
3. Burnish the paper so it becomes smooth - with a smooth stone, gently rub horizontally and vertically in a systematic manner.
4. On tracing paper trace the outline of the picture you are going to draw with pencil, matching the size of the Wasli paper you have - dont forget to leave the border around!
5. Dust red ochre powder on the back pf the tracing , and then trace the image onto the Wasli paper.
make sure the lines are visible.
6. Seal these powdery red ochre lines with walnut ink, ( very pale, very lightly, ) with your Indian squirrel brush - this we start in the next class after the introduction of the squirrel brush in the next class.


25 July 2014

Post Miniature Painting Class -Elephant

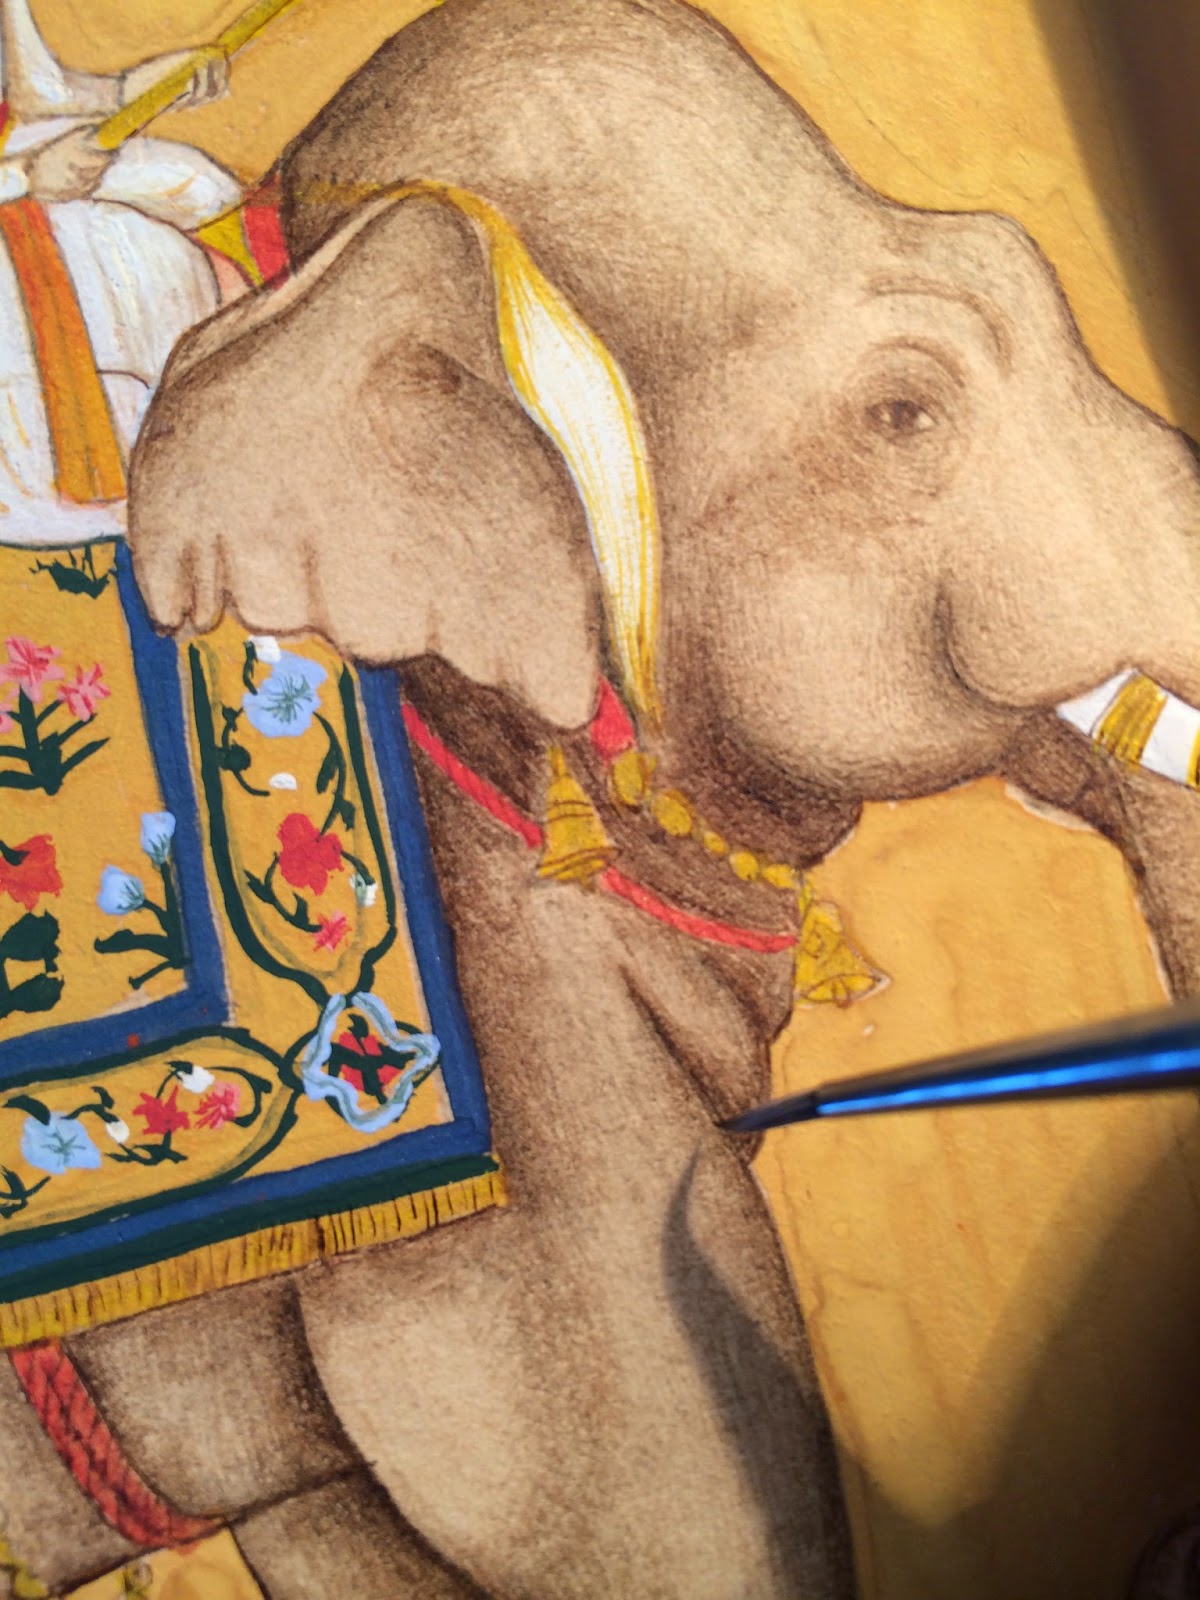
I spent two additional evenings at home after work to complete the shading to the elephant, and add a bit more colours to the flowers to give them more depth. I used the paint that I got from the class a month ago. The pigments are amazing and they instantly work beautifully again on the painting,


14 February 2010

PSTA Miniature Painting Class day 2


In our class today we were introduced to the colours, we also prepared them for application, as well as applying them on our wasabi paper.

1. We began our class drawing the circles with the squirrel brush. It is good to start the class with this meditative act and calm our mind into the painting class. We spent about 20 - 30mins to refresh our memories on how to use the squirrel brush, with the Chinese ink that has been thinned out with water.


2. We learnt many different colour pigments and their names such as cinnabar, indigo, malachite...lovely lovely names. We then learnt how to turn these pigments into usable paint colours by grinding the pigments on a sandblasted glass surface with a glass muller, mixed with water ( a couple of teaspoons) and gum arabic ( about 1/2 teaspoon) . Note that gum arabic is a medium to bind the colour to the painted surface, if too much is added the paint will eventually crack, but it too little is added the paint is runny and will rub off.  Best to test the mixed paint on a piece of paper and rub it with finger after the paint is dry to test whether there is sufficient gum arabic. We then spent a good hour just grinding and preparing paint.


3. We then learnt to mix the paint colours we needed for our painting, and we started to 'block' the colour - by filling in the basic colours of our painting composition. This exercise also took a while as we had to test out and mix until we could match the colours to our satisfaction. Note that for the background colours we used normal sable brush to fill up and block the colours. 


We will be adding details next week.

5 February 2010

PSTA ( Prince's School of Traditional Arts) Miniature Indian painting Class 1 - Lady in yellow

I went to the wonderful exhibition 'Garden and Cosmos' at the British Museum the year before, and again saw it at the NSW Art Gallery and really loved it, so when I found out the class is being taught at the Prince's School of Traditional Arts, I decided to enrolled immediately.

The course I got enrolled in is a 4 day full day (Saturdays) course starting form 10am till 4pm in a comfortable pace. Our teacher Samantha is a very experienced and lovely lady who is truly knowledgable and passionate about her art, making it a real pleasure to learn.

In our first class, Sam gave us a brief introduction and showed us some of her works. We also got to look through a number of books, to choose work that we would like to replicate for the class in order to learn the skills. I chose a painting with a lady preparing a meal with a brilliant lemon yellow background.

We then got a prepared Wasali paper already stuck on the broad, ready to be used. Wasli paper is a specially prepared paper used for miniature painting. It has a smooth surface and can withstand being painted on a number of times.

1. First thing we did was to brundishing the paper to make the surface shinny and smooth. We each chose a smooth stone and use gently but firm pressure to systematically rub the surface of the paper horizontally and then vertically from one end to the other, until it is reasonably smoother and shinier than before.

2. Secondly Sam gave us a cup of strong tea to brush over the paper to give it some undertone. ( approx 5 teabag in one mug of cold water) We used it to brush over the wasabi paper surface, leave it to dry and then do it again, for about 4- 5 times. It could vary depending on the background colour you have for your chosen painting.

3. The chosen painting is photocopied, then we use pencil and tracing paper to trace over the key main lines of the painting, no details at this stage but to get the proportions right.


4. We then rubbed some ochre powder at the back of the image's pencil line with cotton wool.

5. Lastly we positioned the tracing paper over the Wasali paper and taped them down, and then traced the pencil outline again, this time onto the Wasali paper. At the end we all had a ochre powdered lines on the wasabi paper.


6. We then got introduced to the squirrel brush used specifically for Indian miniature painting. It has a nice curve and tapers off to a sharp point so can shade and draw on really minuscule details. To begin off we learn to draw small  delicate circles and practice using it again and again.


7. Once we feel we are comfortable with the brush we then use very pale brown ink to seal the ochre lines on the Wasali paper, as these are merely powdered lines etched into the paper and needs drawing over, otherwise they will fade further before our next class.